We’ve all been there—breaking in new shoes, spending a day hiking, or just overdoing it in the garden, only to discover that tell-tale bubble of fluid on your heel or toe. Blisters are a common skin woe, and they almost always prompt the same debate: should you pop it or leave it alone? This guide will walk you through everything you need to know to treat blisters like a pro.

What Is a Blister, Anyway?
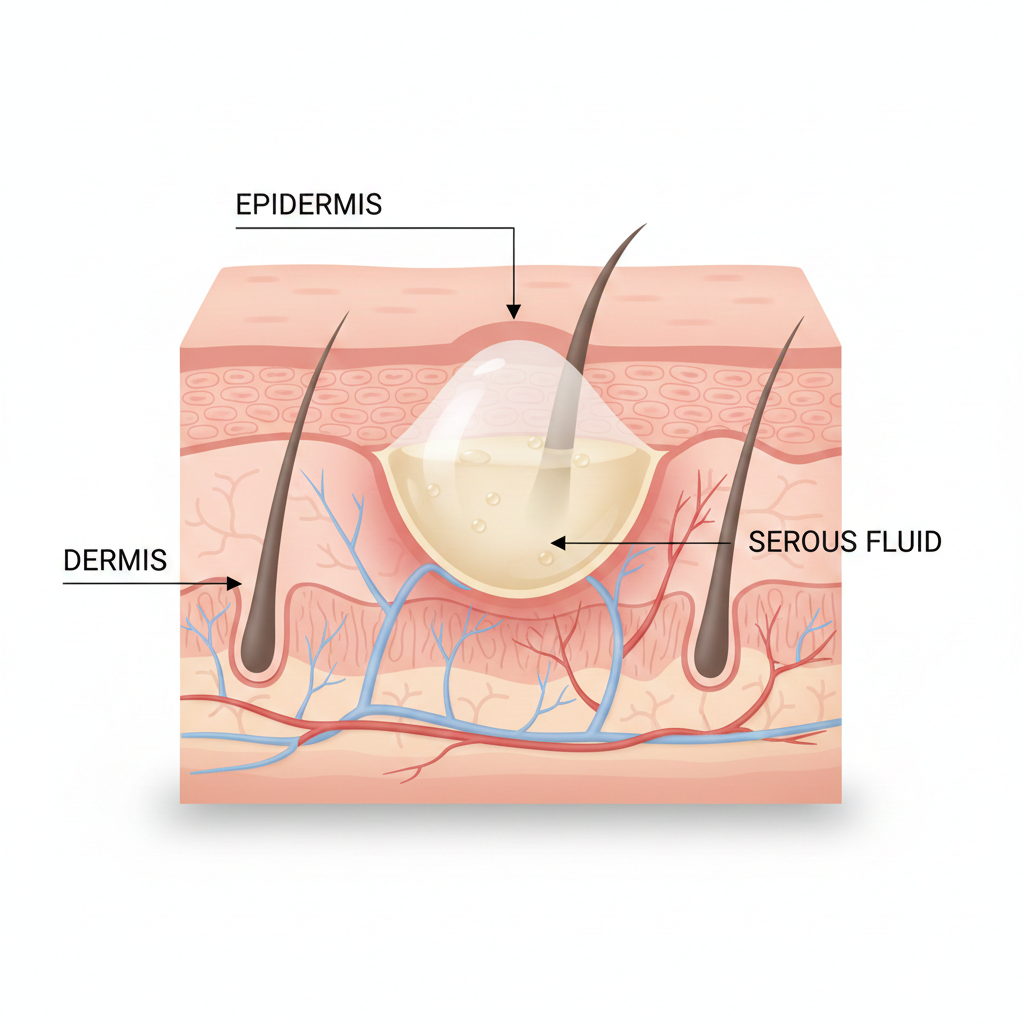
A blister is a small pocket of fluid that forms in the upper layers of the skin. It’s your body’s natural bandage—a cushion of serous fluid (or sometimes blood, if capillaries are damaged) designed to protect the underlying tissue from further damage and give it time to heal. Friction is the usual culprit, but burns, allergic reactions, and infections can also cause blisters.
The Golden Rule: Don’t Pop (Usually)
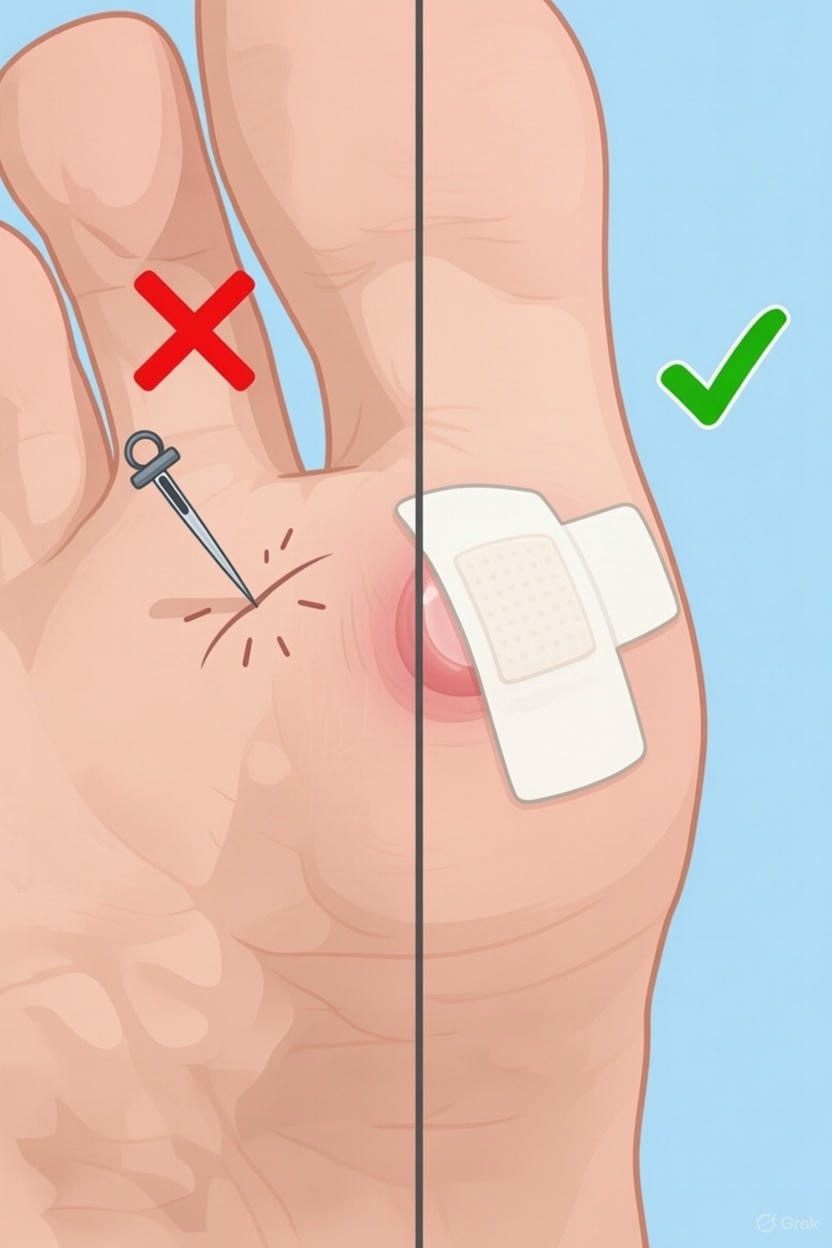
In most cases, do not pop a blister. That intact skin provides a sterile environment, shielding the raw skin underneath from bacteria and preventing infection. A small, unpopped blister will typically reabsorb on its own within a few days as new skin forms beneath it. Popping it prematurely can delay healing, introduce infection, and increase pain.
When to Leave It Be:
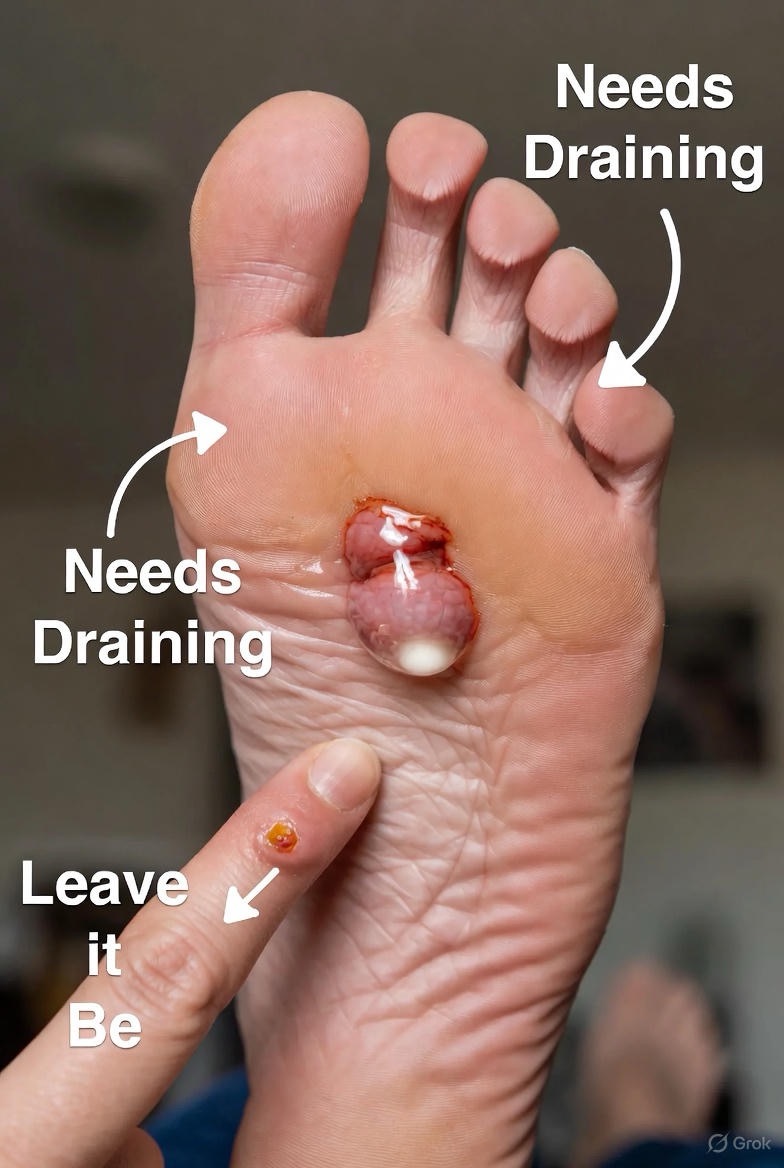
· The blister is small and not painful.
· It’s in a low-friction area.
· The blister is clean and shows no signs of infection (no redness, warmth, or pus).
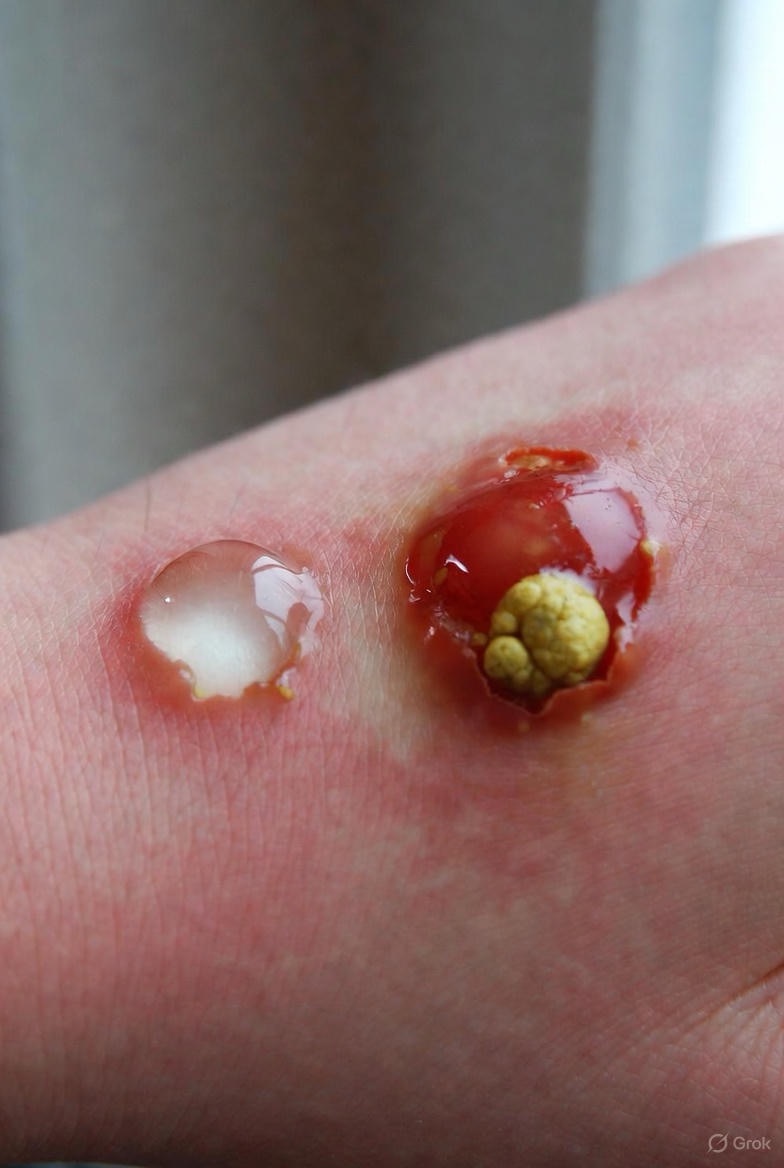
· It’s a blood blister (these have a higher risk of infection if popped).
When Popping Might Be Necessary
Sometimes, a blister is so large, painful, or awkwardly placed that it’s likely to burst on its own from pressure. In these cases, a controlled, sterile drainage is safer than letting it rupture unpredictably.
Signs it might need drainage:
· The blister is large (larger than a dime) and causing significant discomfort.
· It’s in a high-pressure area (e.g., the sole of the foot) and will inevitably burst.
· It’s interfering with walking or essential activities.
How to Pop a Blister Safely (The Sterile Technique)
If you must drain it, follow these steps carefully:
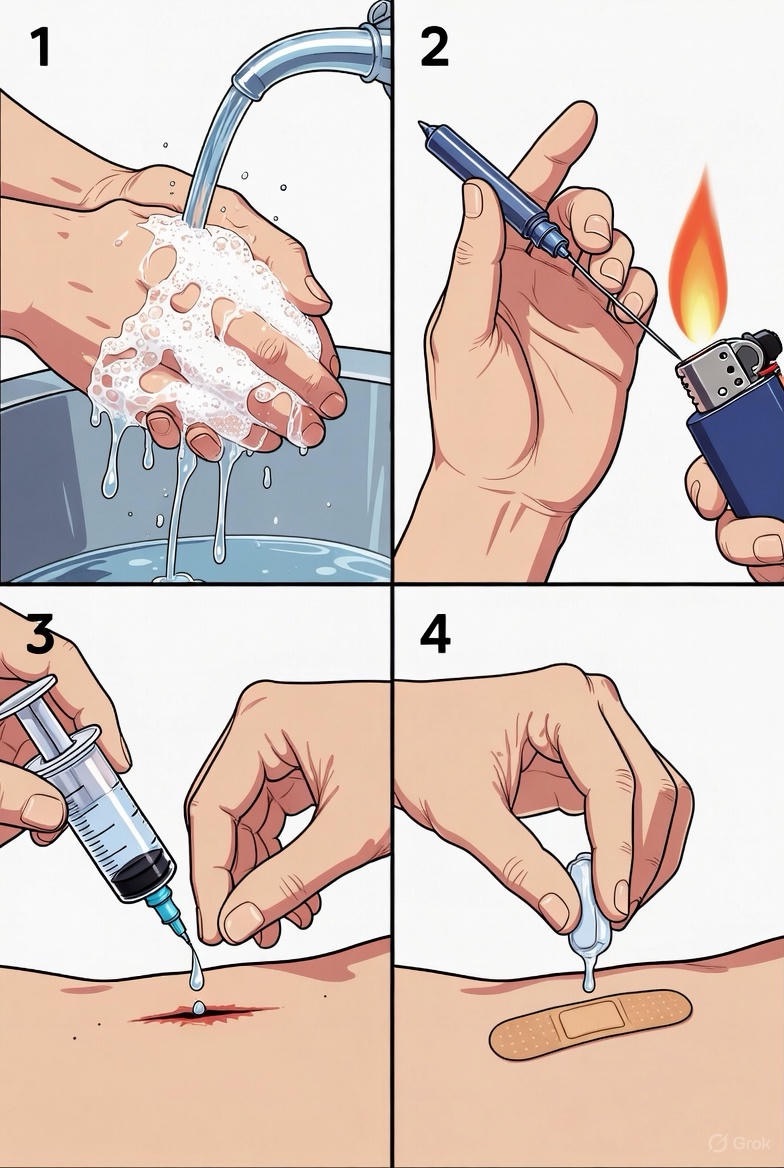
1. Wash: Thoroughly wash your hands and the blister area with soap and warm water.
2. Sterilize: Wipe a needle (a sewing needle or safety pin) with rubbing alcohol to sterilize it.
3. Puncture: Gently pierce the blister at its edge in 2-3 spots. Avoid making a large hole.
4. Drain: Let the fluid drain out by applying gentle pressure with a clean gauze pad. Do not remove the overlying skin—this acts as a natural bandage.
5. Apply Ointment: Dab on an antibiotic ointment (like bacitracin) to reduce infection risk.
6. Bandage: Cover the area with a sterile, non-stick bandage or a specialized blister plaster. Change the dressing daily and whenever it gets wet or dirty.
7. Monitor: Watch for signs of infection: increased redness, swelling, warmth, yellow pus, or red streaks.
The Power of Prevention
The best treatment is to avoid blisters altogether.
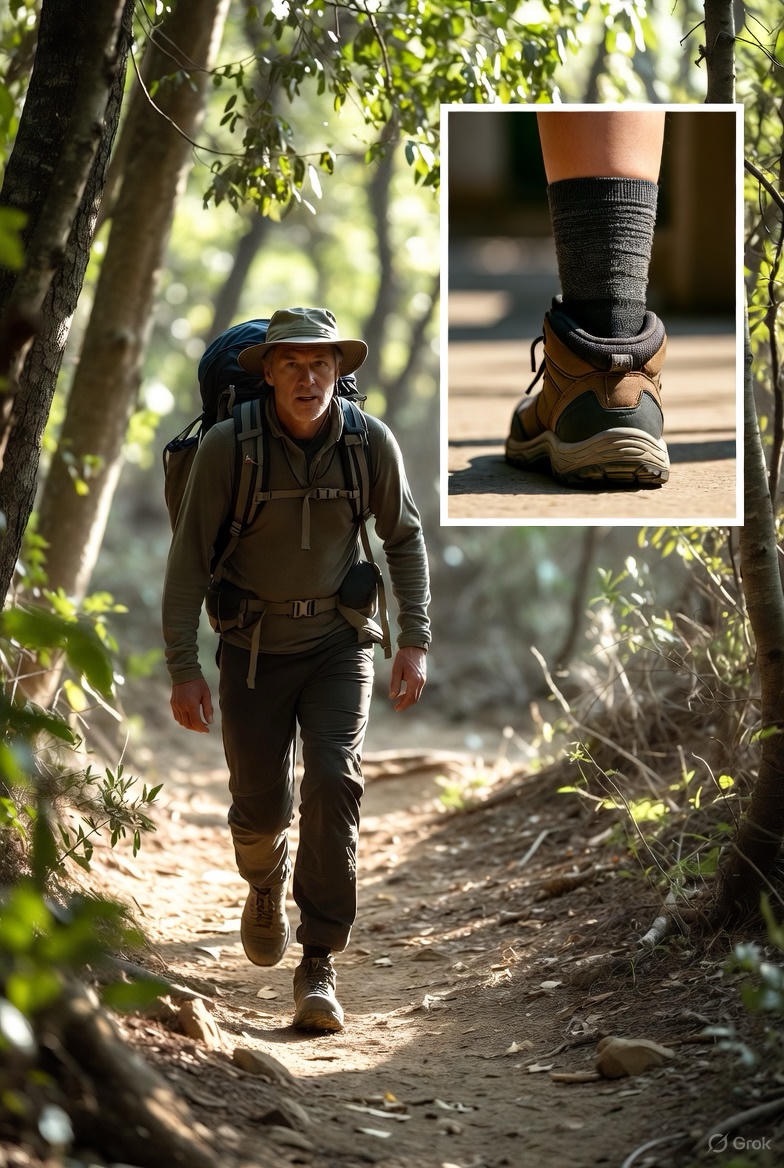
· Proper Footwear: Wear well-fitted shoes and moisture-wicking socks. Break in new shoes gradually.
· Reduce Friction: Use protective products like blister pads, moleskin, or silicone gel sleeves on hot spots.
· Stay Dry: Moisture increases friction. Change damp socks promptly and consider foot powder for sweaty feet.
· Gloves: Wear gloves for manual tasks like gardening or weightlifting.
When to See a Doctor
Most blisters heal with simple at-home care. Seek medical attention if:
· You see signs of infection (pus, worsening redness, fever).
· The blister is very large, recurrent, or in an unusual location.
· You have diabetes or poor circulation—foot care is critical to prevent serious complications.
· The blister is due to a burn, allergic reaction, or infectious disease.
The Bottom Line
Your body knows what it’s doing. That fluid-filled bubble is a healing chamber, not an enemy. While the temptation to pop can be strong, patience is often the best medicine. When in doubt, cover it, protect it, and let your body work its magic. But if pain and practicality demand intervention, do so with caution, cleanliness, and care.
Listen to your skin—it’s smarter than you think.
FAQs
1. Should I pop a blister if it’s painful?
Answer: Not necessarily. Pain is often due to pressure. Try first to cushion and protect it with a donut-shaped moleskin pad or a hydrocolloid blister bandage. These redistribute pressure and can relieve pain without risking infection. Only consider sterile drainage if the blister is very large, tense, and making movement difficult.
2. What’s the fluid inside a blister?
Answer: It’s called serous fluid—a clear, plasma-like liquid that leaks from injured blood vessels. Its purpose is to cushion and protect the underlying tissue. If the blister appears red or purple, it’s a blood blister, caused by damage to deeper, blood-rich tissues.
3. Is it safe to pop a blister with a sterilized needle?
Answer: It can be done safely if you follow strict sterile technique (as outlined in the guide). However, it is always safer to leave it intact. If you choose to drain it, sterilize the needle with alcohol, pierce at the edge, leave the overlying skin in place, and keep it clean and covered afterward.
4. What should I do if a blister pops on its own?
Answer:
1. Gently wash the area with mild soap and water.
2. Do not peel off the loose skin flap unless it’s dirty or ragged. Trim it carefully with sterilized scissors if necessary.
3. Apply an antibiotic ointment.
4. Cover it with a sterile, breathable bandage that won’t stick to the raw skin (e.g., a non-adherent pad).
5. Change the dressing daily.
5. How can I tell if my blister is infected?
Answer: Watch for these signs:
· Increased pain, redness, warmth, or swelling around the blister.
· Yellow or green pus (instead of clear fluid).
· Red streaks leading from the blister.
· Fever or chills.
If you notice any of these, see a doctor promptly.
6. What’s the best bandage for a blister?
Answer: Hydrocolloid bandages (like Compeed or Band-Aid Blister Care) are often considered the gold standard. They cushion the area, absorb fluid, create a moist healing environment, and reduce pain. For unpopped blisters, they provide excellent protection against further friction.
7. Should I use alcohol or hydrogen peroxide on a popped blister?
Answer: No. These can damage the fragile new skin cells and delay healing. For cleaning, use only mild soap and water or a saline solution. After cleaning, apply a petroleum jelly or antibiotic ointment to keep the wound moist and covered.
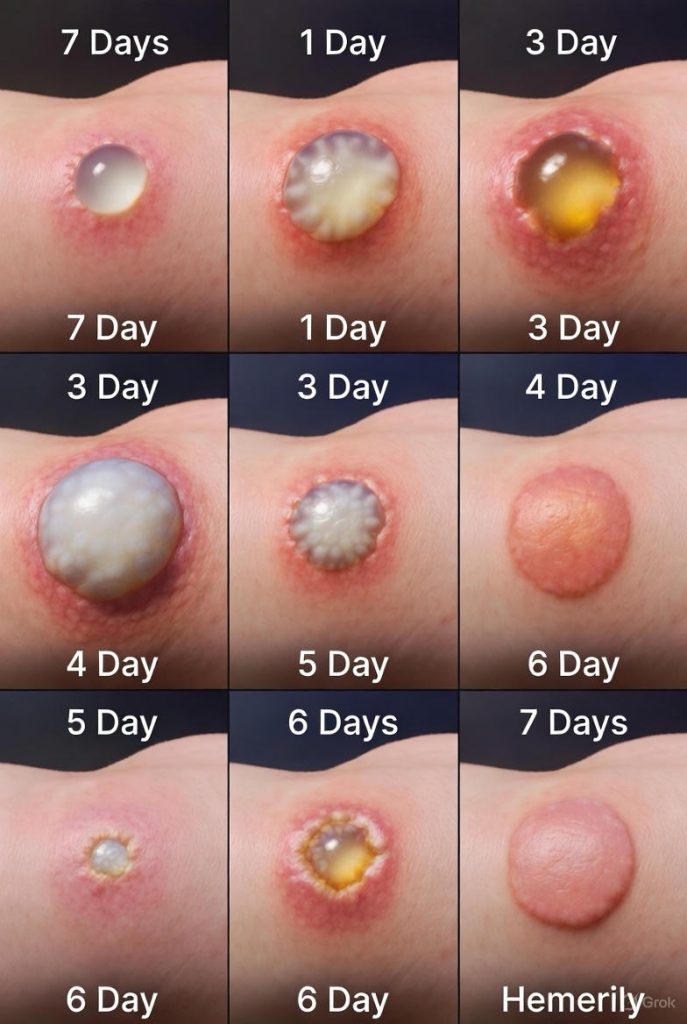
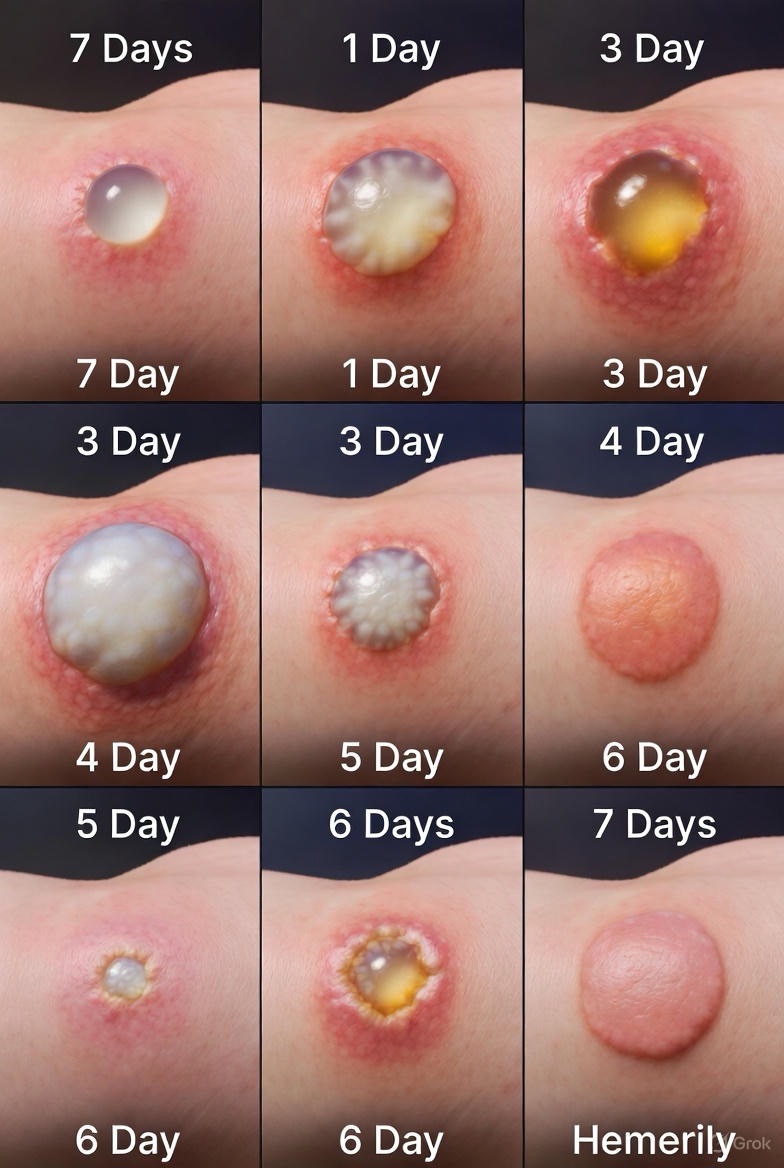
8. How long does it take for a blister to heal?
Answer: A small, unpopped blister typically reabsorbs in 3–7 days. A drained or popped blister, if kept clean and protected, will form a new layer of skin underneath in about 3–5 days, with the outer layer peeling off in a week or so. Full healing can take 1–2 weeks.
9. Why is it so important for diabetics not to pop blisters?
Answer: Diabetes can cause neuropathy (loss of sensation) and poor circulation, especially in the feet. A small blister can quickly become a serious foot ulcer that is slow to heal and prone to severe infection. Diabetics should never pop blisters and should consult a healthcare professional for any foot skin issues.
10. Are there any home remedies for blister relief?
Answer: While protection is key, some gentle home care can help:
· Aloe Vera: Its soothing, anti-inflammatory properties can calm the skin around the blister.
· Green Tea Soaks: Cool, brewed green tea has mild anti-inflammatory properties.
· Vinegar? Avoid. Despite some claims, vinegar can irritate broken skin.
Remember: These are for comfort only. The core treatment is clean, cover, and protect.
11. Can I exercise or run with a blister?
Answer: It’s not ideal, but if you must:
· Cover it securely with a blister-specific bandage or tape (like kinesiology tape or moleskin).
· Wear moisture-wicking socks and well-fitted shoes.
· Consider using toe sleeves or friction-reducing balms (like Body Glide).
· Stop if pain increases or the blister ruptures.
12. What’s the difference between a friction blister and other types?
Answer:
· Friction Blister: Caused by repetitive rubbing (e.g., from shoes). Clear fluid, very common.
· Blood Blister: From a pinch or crush injury. Filled with blood, deeper damage.
· Burn Blister: From thermal, chemical, or sunburn. Requires careful handling.
· Infection Blister: From conditions like chickenpox or impetigo. Requires medical treatment.
The “pop or not” rule applies primarily to simple friction blisters.
Final Pro-Tip: When in doubt, think of the blister as your body’s own perfect bandage. Your goal is to protect that bandage until the new skin is ready.